Raspberry Pi Prank Tutorial – Making Your Co-Worker’s Desk “Magically” Go Up and Down
Besides my “work” as a software engineering student at Aalborg University, I also work as a student programmer at a software company here in Aalborg. A couple of months ago, one of my colleagues (Thomas) came by my desk and asked me:
Wouldn’t it be fun if we could control Sanne’s desk remotely?
At first I laughed at the idea – it sounded a bit overkill – but then, the engineering part of me took over and Thomas and I started to plan how this could be realized. In this “special edition” Raspberry Pi tutorial, I describe how Thomas and I made this work – from the initial thoughts to the final “product”.
Initial Thoughts
By showing up (very) early at work a couple of days in a row we got some time to do the initial analysis of Sanne’s desk’s “height control unit” before she showed up. Since day one, I thought this part would be the trickiest one, but it turned out that Sanne’s desk was actually quite nice and simple to work with. On Sanne’s desk a manual controller is mounted – it has a set of buttons, a pair of them being “Up” and “Down”. The controller interfaces with the desk using an RJ45 cable (the desk has the RJ45 female part, and the controller has the RJ45 male part) – making it straight forward to unplug and do some voltage tests.
From our empirical studies, we concluded the following:
- one wire always delivered 0.4V from the desk to the controller (pin
x), - by connecting (short-circuiting) pin
xand piny, the desk went up, and - by connecting pin
xand pinz, the desk went down.
So basically, what we could derive from this study was that we needed some kind of device that could trigger a relay via a wireless connection, and at the same time pass on “commands” from the manual/onboard desk controller to the desk.
Purchase of Hardware
After doing some thinking and research, we came up with the following system architecture:

… where the basic idea is that we want to control the Raspberry Pi using a web-interface from either a computer or mobile device.
Details of the purchased Raspberry Pi hardware and peripherals (including the relay board and WiFi adapter) can be found here: Getting Started with My Raspberry Pi – Part 2: RPi Specs and Peripherals. It should be noted that, for this build, we used the Edimax EW-7811Un WiFi adapter in favor of the Ralink RT5370 (the Edimax adapter was the one we received first and has worked perfectly since then – so we found no reason to switch to the Ralink adapter).
Setup and Programming
Based on the system architecture, the main setup and programming tasks were to:
- Make the Raspberry Pi connect to a WPA/WPA2 based WiFi or create an ad-hoc network as fallback
- Setup web server
- Make the two relays on the relay board click using the GPIO pins on the Raspberry Pi
- Make a small HTML5 and JavaScript based desk controller that can make both relays click
– Connect to WiFi or Create an Ad-hoc Network as Fallback
I have covered this topic in one of my previous blog posts, here: Raspberry Pi Tutorial – Connect to WiFi or Create An Encrypted DHCP Enabled Ad-hoc Network as Fallback.
– Setup Web Server
This is covered in great detail by Mark Ingram here: http://markingramuk.wordpress.com/2012/08/12/accessing-gpio-from-a-web-server/ (see my Raspberry Pi blog post survey for my comments on that tutorial: Getting Started with My Raspberry Pi – Part 1: Blog Post Survey)
– Using the GPIO Pins
In my previous blog post: Getting Started with My Raspberry Pi – Part 1: Blog Post Survey I cover a couple of blog posts about using GPIO on the Raspberry Pi – I started using the RPi.GPIO Python module but ended up using WiringPi since it includes a small GPIO Swiss army knife application that can be invoked by non-root users. The blog post survey includes links to different sites describing each approach.
– Raspberry Pi Desk Controller
The Raspberry Pi Desk Controller has been implemented as an HTML5/JavaScript-enabled web-application with all logic represented using knockoutjs and the MVVM pattern. Basically, the application has a Relay function object representing a single relay, and as seen from the web-interface below, the relay exposes a couple of different functionalities. For instance, while pressing the “arrow up” button down, the relay instance asynchronously invokes a web-service on the Raspberry Pi, asking it to “turn on” the relay on channel 23 – and similar, when releasing the button, the client asks the Raspberry Pi to “turn off” the relay making the desk stop moving upwards. The application also contains status indicators, showing whether a relay is “on” or “off”.
 The code is open-source and available at github: https://github.com/swlasse/RPiDeskController
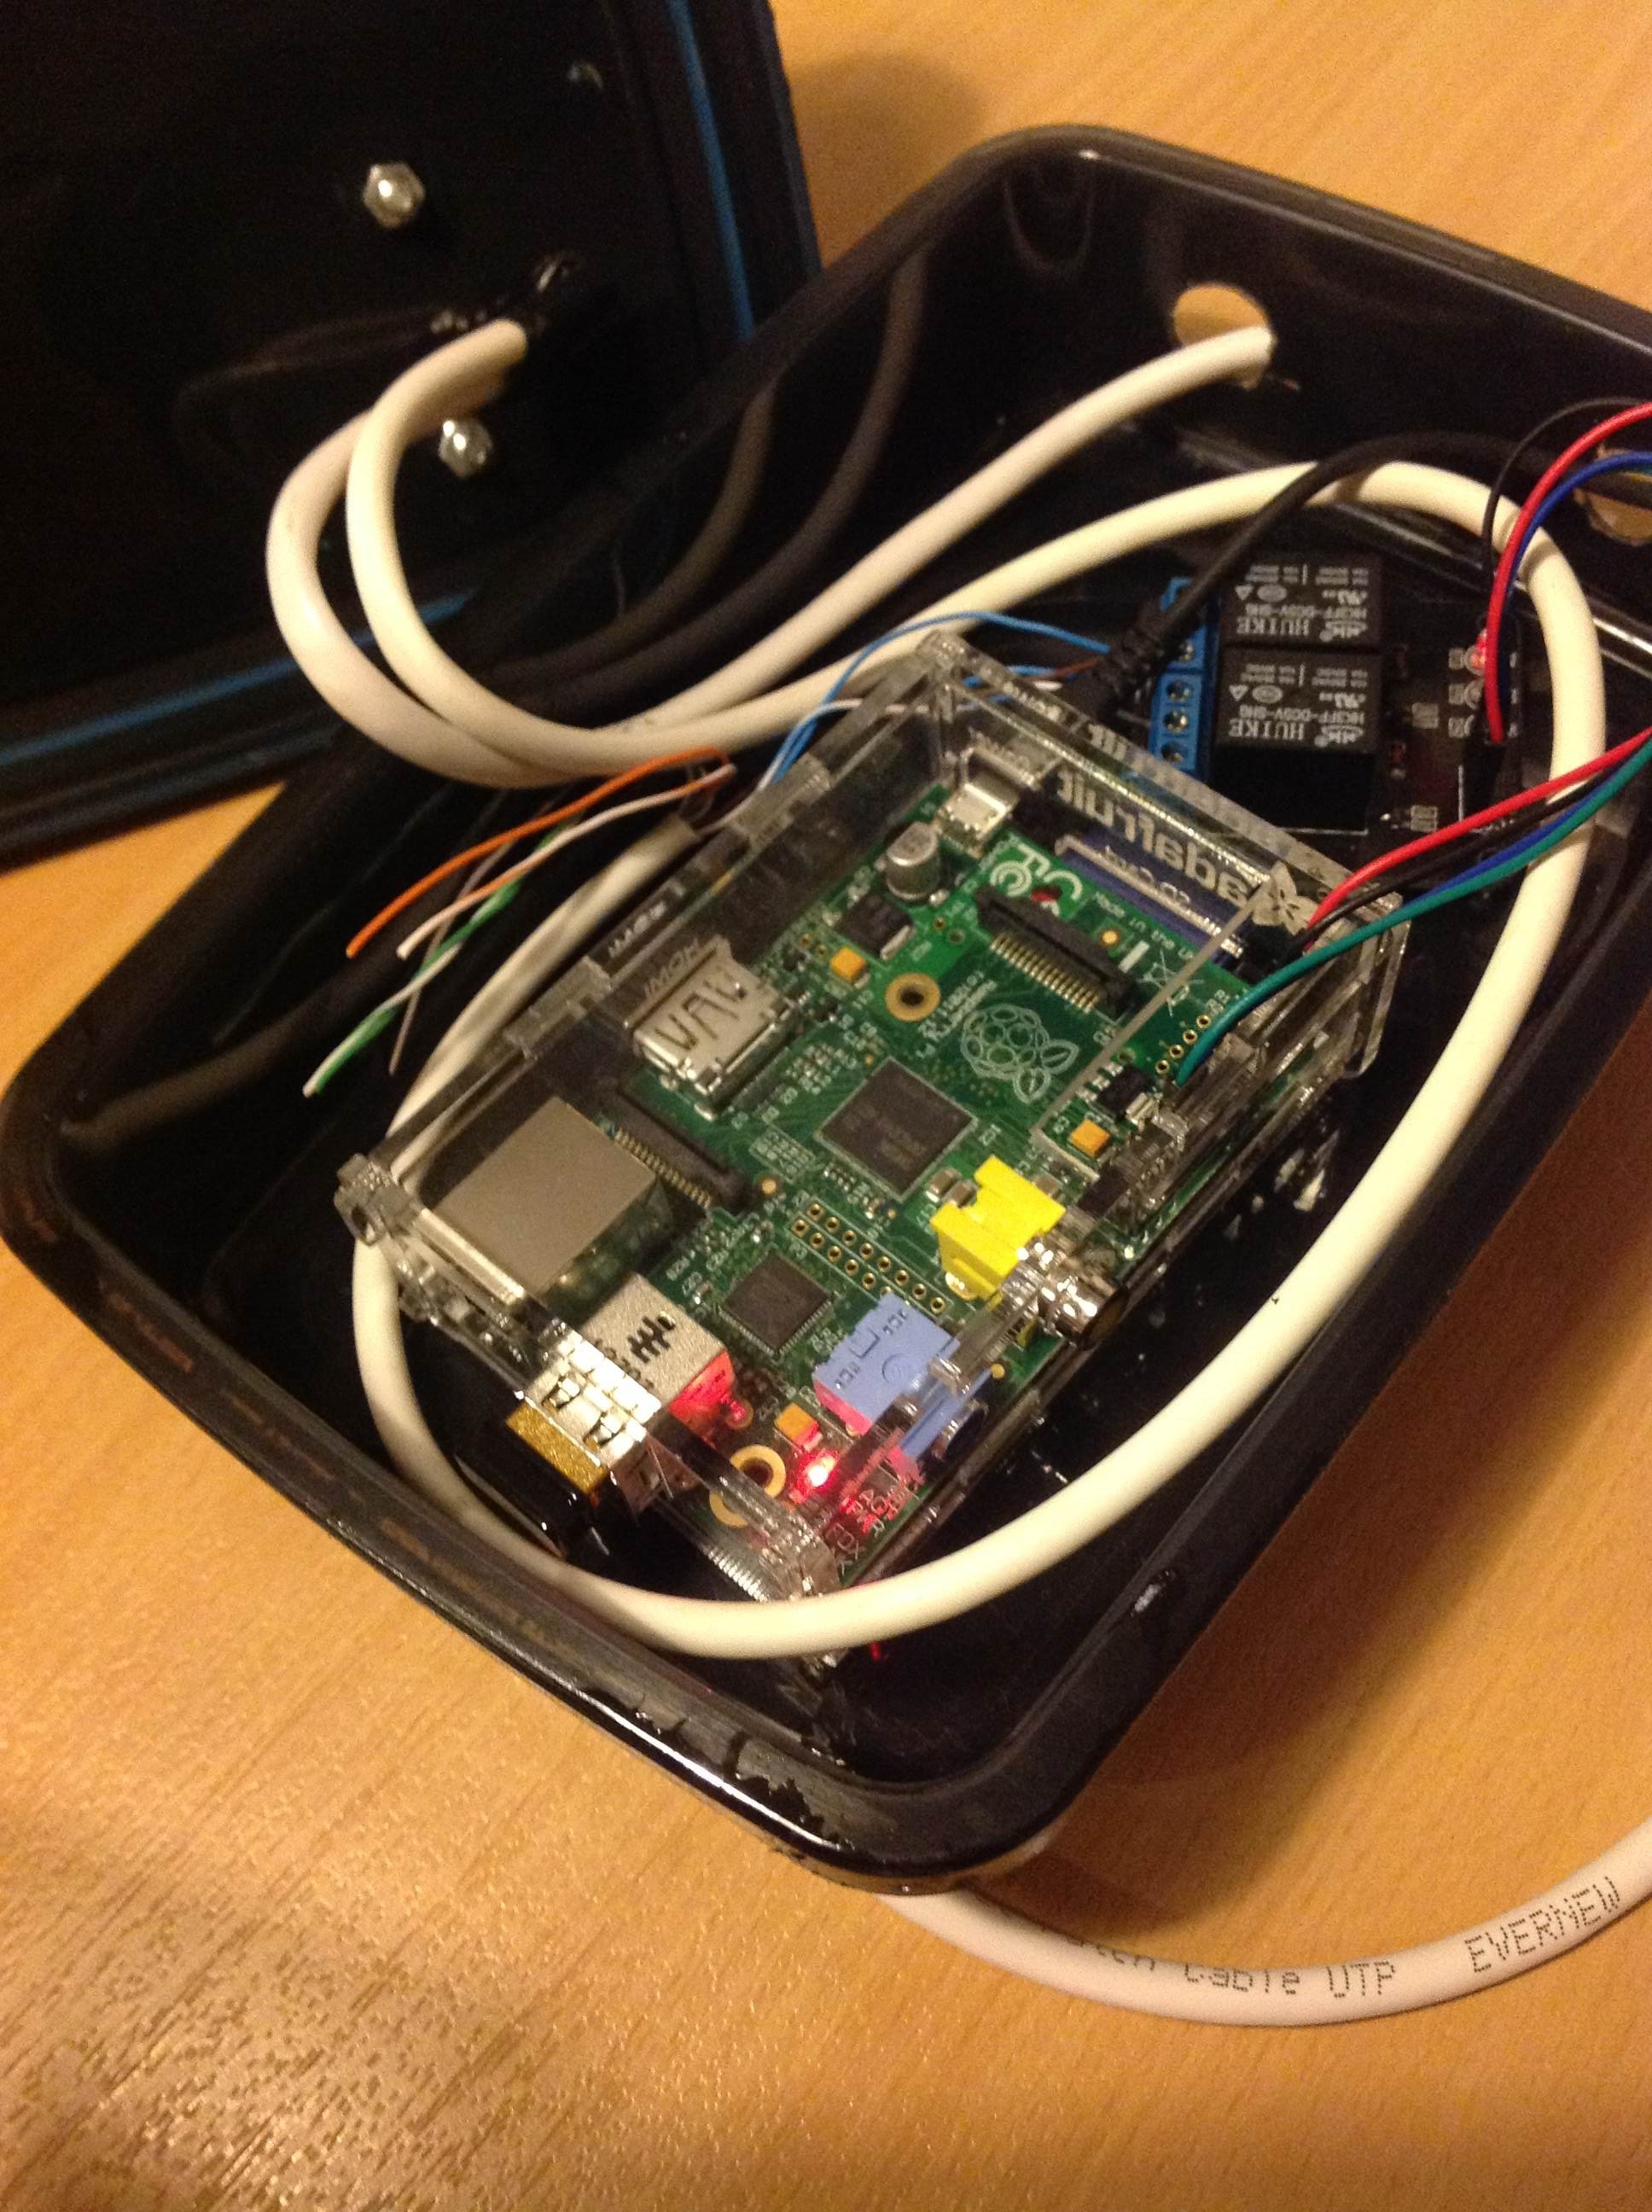
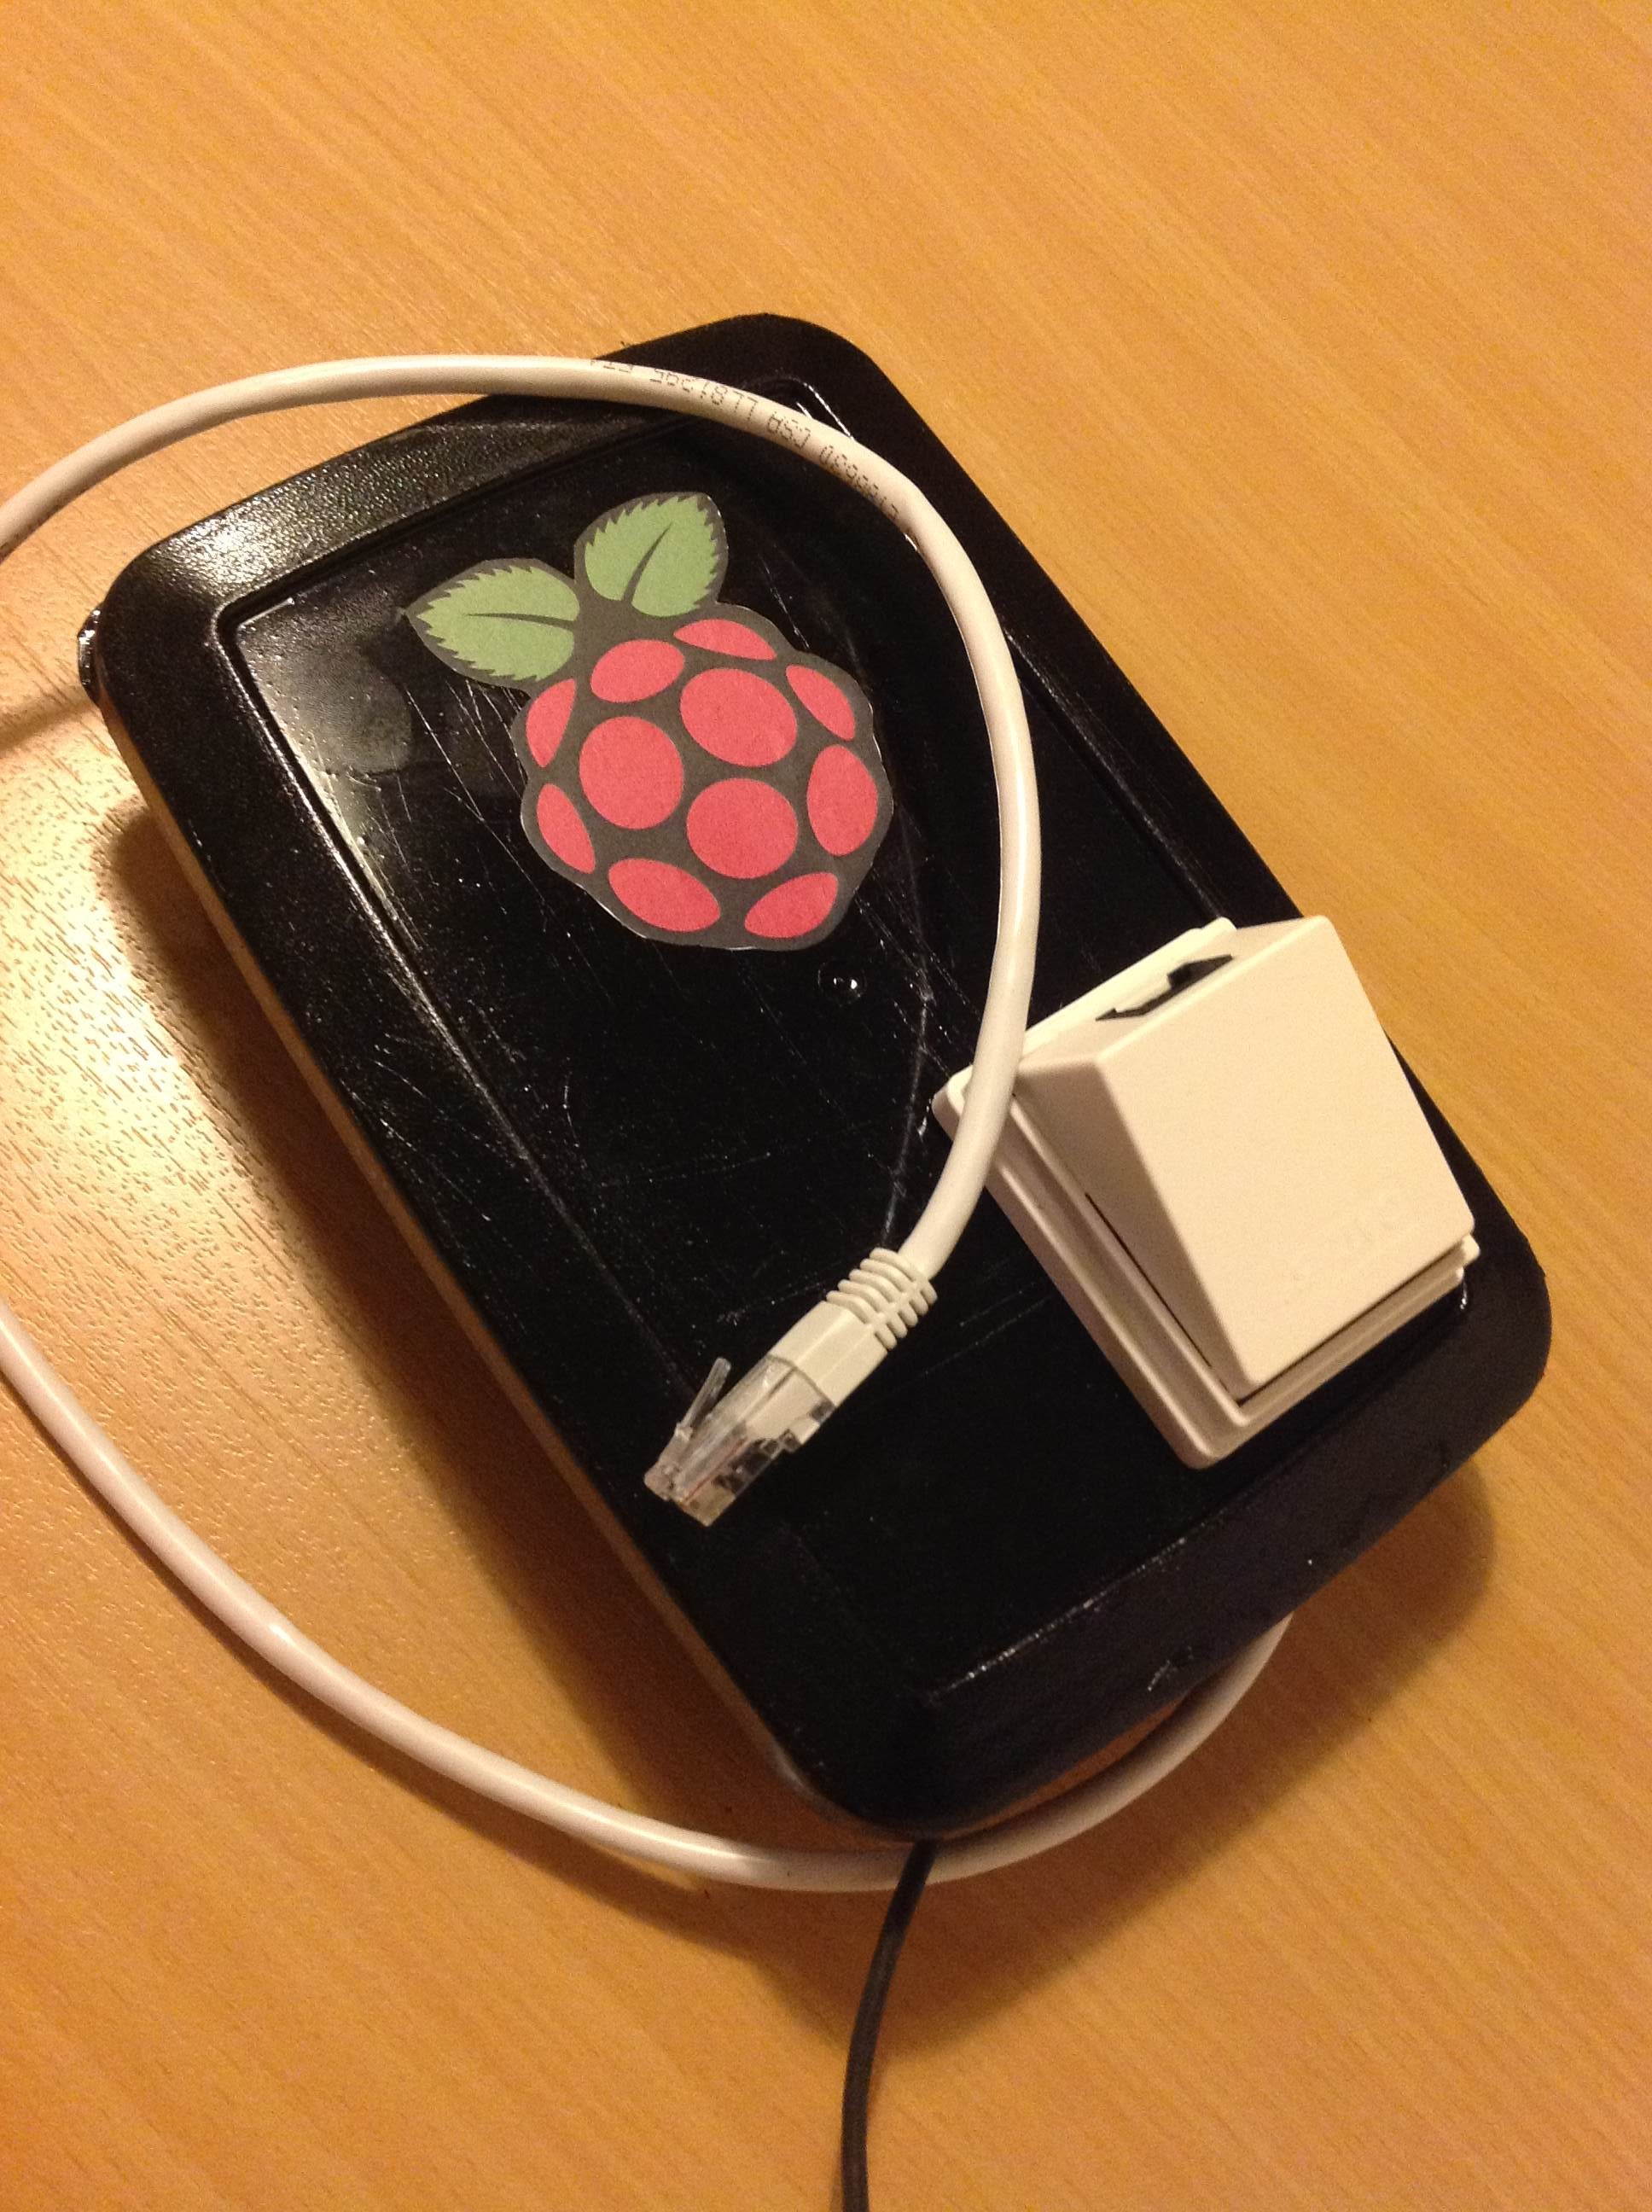
Assembling
Finally, it was time to put everything in a case. We decided to make it cheap and simple, so we bought a lunch box, drilled a couple of holes for power adapter and RJ45 cables, painted it black, added an RJ45 wall mount box on top, and finally, installed the Raspberry Pi and the relay board.
The final outcome is seen here:


Test
We tested the Raspberry Pi Desk Controller yesterday (Wednesday the 5th of December). First, Thomas and I arrived early, mounted the Raspberry Pi Desk Controller and installed a web-cam such that we could go upstairs and follow the action remotely – and it was REALLY funny to watch 😀 (I should probably mention that Sanne also found this prank amazingly funny, especially because we have spent so many many hours on preparing this).
Wrap Up
I think this prank is the one I have spent most time on preparing (at least 50 hours), but besides getting a good laugh it also taught me a lot about the Raspberry Pi, networking on Linux, and GPIO – so all in all, a great way to learn and have fun with your co-workers at the same time 🙂


Brilliant. I’m going to do this to my coworker very soon. Good writeup and thank you for the idea!